
 Rashad Glover
Google Doc is a very important part of the Google Documents (now Google Drive) family. If you have ever used Microsoft (MS) Office from the 80’s to 2006, you’re going to be able to use Google Docs. The GUI (Graphical User Interface) is very similar to that of a traditional word processor. Google Documents is an online web browser based office suite free of charge that you can access anywhere in the world (except certain parts of China) and open your basic Microsoft Office documents (except MS Publisher, and MS Access).
Google Documents allows you to create new MS Word styled documents, PowerPoint like presentation and Excel like spreadsheets. All these files can be shared and displayed on a website or blog page. That’s why I’m covering this topic in my book and apps. Depending on what you do, you just might want to embed a PowerPoint in your blog or your calendar in your mobile App. It’s completely up to you. So let me show you how it works.
First let’s go back into your Google account and click on the “Documents” tab at the top of your browser.
![]()
(Screenshot of the “Documents or Drive” tab.)
You should now be inside of the Doc’s area where you will see all of the files you have created or uploaded previously. If you have never used Google, it should be empty like the image bellow.
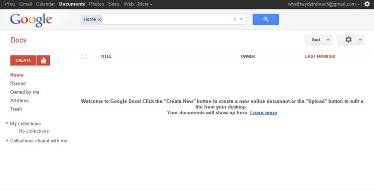
(Screenshot of an empty Google Docs account.)
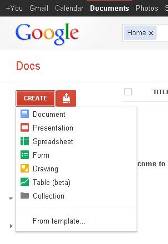
(Screenshot of the “Create” drop down menu.)
Now click on the button labeled “Create” and you should see a drop down menu. The first app is called Documents which is Google’s equivalent MS Word, Presentations is the Google equivalent of MS PowerPoint, Spreadsheets is a simplified version of MS Excel.
“Forms” allows you to create WebPages that people can input data and it returns to your Google spreadsheets. Drawing allows you to create diagrams and charts that can’t be made in the other Google Apps. I’m not going to show you step by step how to use Google Documents but I’m going to show you how to navigate the interface and how to get a hold of the embed code to add your documents to a web page. So let’s give it a try.
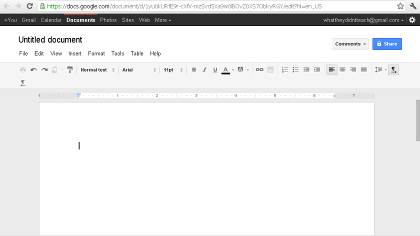
(Screenshot of Google’s word processor.)
One of the first things you want to do is name your file. This is very simple. Just click on the bold words on the top left screen labeled “Untitled document”.
(Click the Untitled document to change the name)
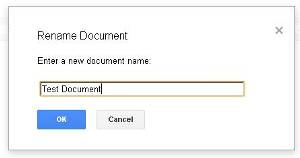
(Screen shot of the “Rename Document” prompt.)
Once you have renamed the Doc and pressed the blue OK button, you should be back at the word processor. Your new DOC name should be at the top left hand corner where the “Untitled document” was located before.
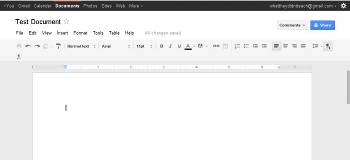
(Screenshot of the renamed Google document.)
Now we are going to show you how to insert an image and text then share it. Look at the text at the top of the word processor and click the word “Insert”. Once you have clicked it you should see an option to upload your image.
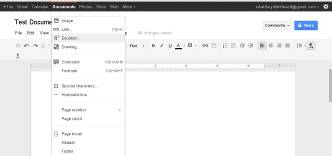
(Screenshot to the “Insert” drop down menu.)
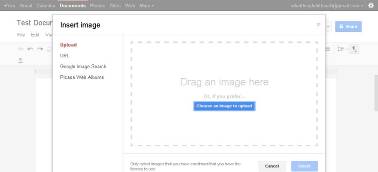
(Screenshot of “Insert image” option for upload.)
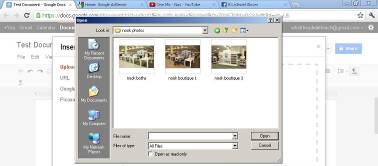
(Now choose your Image.)
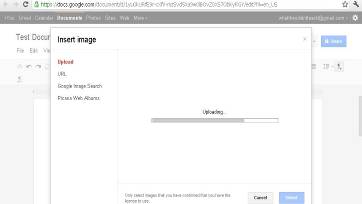
(Now wait for your image to load.)
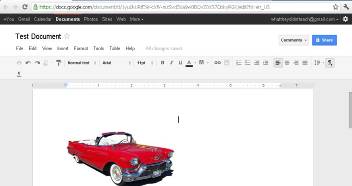
(Screen shot of an old Cadillac that I selected and uploaded.)
This is one of the most important parts of making a word doc, so I just wanted to make sure you got a grasp on adding graphics.The typing part should be self explanatory (just type). You don’t have to worry about saving your document because every time you type a word or add a graphic Google just backs it up for you. I love this because I never lose a document. I typed half of this book using Google Documents.
If I ever want to give away parts of this book on my web page all I would have to do is copy and paste Straight from Google Docs and it’s just like copying HTML (Hyper Text Markup Language) from website creation software. Since most eBooks are modified HTML anyway, all you have to do is copy and paste your Google doc into whatever eBook making software that’s available.
Now let’s talk about exporting and sharing your Google Document. In the left hand top corner there is a blue “Share” button. Click and wait for the share window to pop up.
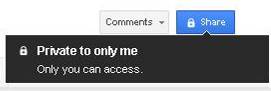
(Screenshot of the “Share” button.)
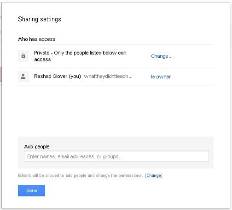
(Screenshot of the share box.)
Now add someone you trust’s email in the “Add people” box and that’s it. They will receive an email allowing them to only access this file and edit it. This is awesome if the editor of your website or book lives across town or a 1,000 miles away. Now lets say you want to export the file to a word file (a basic .doc file) just click the “File” tab at top of the screen and navigate over to the “Download as”.
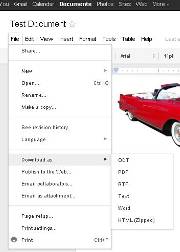
(Screenshot of how to export your file to different file types.)
This will expand another panel and all the possible export formats that are available. If you don’t want a file that people can edit you’re going to select the “PDF” link, otherwise select Word and that’s it.